Last updated: August 20, 2026
The bucket toilet is the setup experienced car campers keep going back to after they have tried the fancier options. It is a pail, a seat, a bag and a powder. Nothing to prime, nothing to rinse, nothing that stops working because a seal hardened over winter in the garage.
It is also the setup people get wrong most often, usually by using the wrong bag or skipping the powder. This is a build and use guide: what to buy, how to assemble it, how to use it without unpleasant surprises, and what to do with the result.
This article contains affiliate links. If you buy through them, we may earn a commission at no extra cost to you. Learn more.
Quick Answer
How do you make a bucket toilet for camping that works?
- Start with a rigid 5 gallon pail and a snap-on toilet seat that matches the rim.
- Use waste rated liner bags, not kitchen trash bags, and add the gelling powder every time.
- Double bag: one liner in use, one zip-close outer bag for the sealed result.
- Add a privacy shelter, or the whole thing quietly stops being used.
Bottom line: the pail is the cheap part, the bag and powder are what make it work.
What a Bucket Toilet Is and Why It Holds Up
A bucket toilet is a rigid pail with a toilet seat clipped to the rim and a lined bag inside. Absorbent gelling powder turns liquid into a gel that will not slosh or leak, and the sealed bag is packed out at the end. There is no tank, no flush and no plumbing to fail.
That simplicity is the point. Every other camp toilet type has a component that eventually leaks, sticks or smells: a slide valve, a pump, a bottle, a seal. A pail has none of them, which is why it survives seasons in a trunk and still works on the first trip of spring.
What You Need to Build One
Four items: a rigid pail, a snap-on seat with a lid, waste bags with gelling powder, and something to sit the whole thing in privately. Optional extras that get used every trip are nitrile gloves, hand sanitizer, a small trash bag for the outer wrap and a battery lantern with a hook.
Reliance sells the pail and seat combination as the Luggable Loo, and separate snap-on seats are sold to fit standard pails if you would rather buy the pail locally. Either route works; the only thing that matters is that the seat clips firmly to the rim and does not slide under load.
The pail
Use a rigid pail rather than a thin-walled one, because the rim is what carries all the weight when someone sits down. Check the seat and the pail are described as compatible, since rim thickness varies between pail makers and a seat that half-clips is worse than no seat at all.

The seat
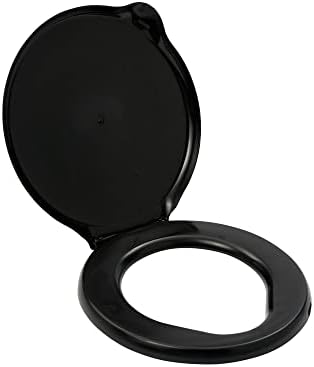
A snap-on seat with an attached lid keeps the pail closed between uses and keeps insects out. Some versions add a splash guard or a hinged lid that stays open on its own, which sounds trivial until you use one in the dark with a lantern in one hand.
The bags and powder
This is the part that decides whether the setup is pleasant or grim. Waste rated liner bags are thicker than kitchen liners and are sized for a pail rim. The gelling powder is what stops liquid moving, and most kits either pre-load it in the bag or supply it in sachets.

How to Set It Up at the Site
Choose a spot downwind of the kitchen, out of the sightline of neighboring sites, on ground that drains. Set the pail on level ground so it does not rock. Line it with a bag, roll the excess over the rim, clip the seat down over the folded edge, and add the powder before first use rather than after.
Then set up the privacy shelter around it and hang a lantern from the ceiling loop. If you are using a bucket toilet without a shelter, at least give it a screen of some kind, because the difference between a used camp toilet and an ignored one is nearly always privacy.
The order matters more than it looks
Bag first, powder second, seat last. Clipping the seat before folding the bag over the rim traps the liner under the clips and it tears when you lift it out. Getting this sequence right once at home means nobody is improvising it in the rain.
Using It Without the Usual Problems
Add a scoop of powder after each solid use, close the lid every time, and change the bag before it is heavy rather than when it is full. A bag that is lifted at two thirds full comes out cleanly; one that is filled to the rim strains the liner exactly where you have to grip it.
Keep the sealed bags in a dedicated container in the vehicle, not loose in the trunk. A lidded tote lined with a trash bag costs almost nothing and means one leaking bag does not become an upholstery problem.
Separating liquid from solid helps a lot
Most odor comes from the two mixing. If your group is willing, a separate labeled bottle for urine keeps the bag dry, lighter and far less unpleasant, and it stretches the number of uses you get from each liner. Composting toilets are built entirely around this principle.
Bucket Toilet Compared With the Alternatives
| Setup | What it costs you | After the trip | Fails when |
|---|---|---|---|
| Pail with bag and powder | Least money, least maintenance | Sealed bags packed out | Thin bags or no powder used |
| Folding frame with bag | Packs flatter, less rigid | Same as the pail | Legs sink into soft ground |
| Two-piece flush toilet | More money, more upkeep | Tank carried to a dump station | Valve seal dries out in storage |
| Composting unit | Most space and money | Urine bottle emptied often | Left tilted or overfilled |
Disposal: Ask Before You Assume
Where a sealed waste bag may be put is decided by the land manager and the local waste authority, not by the bag maker. National Park Service sites, Forest Service districts, BLM areas, state parks and private campgrounds each publish their own rules, and some provide dedicated receptacles while others require you to carry everything home.
Leave No Trace keeps current human waste guidance at lnt.org, and many high-use areas now expect waste to be packed out rather than buried. Never empty a bag or a bottle onto the ground, into a vault toilet vent or into a stream, and check the site rules before the trip rather than at the gate.
Frequently Asked Questions
Can I use regular trash bags in a bucket toilet? It is not worth the risk. Kitchen liners are thinner and not sized for a pail rim, so they slip under the seat and can split when lifted. Waste rated liners cost little more and are designed for the load.
How many uses does one bag get? That depends on the bag size and how much powder you add, and the maker states a rough figure on the pack. In practice most people change the bag daily on a family trip and after two or three days solo.
What do I put in the bucket instead of gelling powder? Some campers use cat litter, sawdust or wood pellets as an absorbent instead. They work, but they add weight and do not gel liquid the way the purpose-made powder does, so bags get heavier and messier to handle.
Does a bucket toilet smell? Only if liquid sits uncovered. Powder after every solid use, a closed lid, and a separate bottle for urine keep it close to odorless. A pail left open in the sun is where the complaints come from.
What size bucket is best? A standard 5 gallon pail is what almost every snap-on seat is designed to fit, so that is the safe choice. Smaller pails exist for tight vehicles, but seat compatibility gets much harder to guarantee.
Do I still need a toilet tent? At a campground with neighbors in sight, yes. That is usually what determines whether the setup gets used at all, and it costs less than most of the toilets it goes around.
The Bottom Line
A bucket toilet is the least complicated camp sanitation setup that still works properly, provided you buy waste rated bags, use the gelling powder every time and pack everything out according to the rules where you are camping. Spend your money on the consumables and the privacy shelter rather than on the pail. For the consumable side, see our guide to camping toilet bags and gels, compare formats in the wider camping toilet guide, and read the rules on human waste at camp before your next trip.