
Last updated: August 20, 2026
Waking up to a wet sleeping bag ends a trip early. What makes it frustrating is that a leaking tent is usually not one big hole. It is a slow accumulation of small failures: a seam whose tape has lifted, a fly touching the inner wall, a coating that has aged out, and a ground sheet quietly funneling water underneath the floor.
Almost all of it is fixable at the kitchen table for the cost of a tube of sealant. This guide works through the four places tents actually leak, how to find which one is yours, and the repairs that hold, including the cases where the water was never coming through the fabric at all.
This article contains affiliate links. If you buy through them, we may earn a commission at no extra cost to you. Learn more.
Quick Answer
How do you stop a tent from leaking?
- Find the source first: seams, worn coating, fly contact, or water tracking in from the ground sheet.
- Seams are the most common failure. A seam sealer made for tent fabric handles them from the inside of the fly.
- An aged, flaking coating on a floor or fly needs a tent fabric sealer, not a spray meant for jackets.
- If the inner wall is wet where the fly touches it, that is contact, not a leak, and it is fixed by tensioning the pitch.
Bottom line: diagnose before you seal, because half of what looks like a leaking tent is condensation, contact, or ground water.
Find Out Where the Water Is Actually Coming From
Before buying anything, work out which of four problems you have. Water dripping along a seam line points to seam tape failure. Fine misting through a panel in heavy rain points to a worn coating. Wet patches on the inner tent exactly where the fly touches it is contact. Damp spreading upward from the floor edges is ground water.
The quickest test is a garden hose at home on a dry day. Pitch the tent, run water over one section at a time, and have someone inside with a flashlight watching where it appears. That tells you which repair to do rather than sealing everything and hoping.
Rule Out Condensation First
On a cold night with several people breathing inside, moisture collects on the inside of the fly and drips. It looks exactly like a leak. The difference is location: condensation is spread evenly across the underside of the fly rather than tracked along a seam, and it is worst on still, cold, humid nights. Ventilation, not sealant, is the fix.
Sealing the Seams
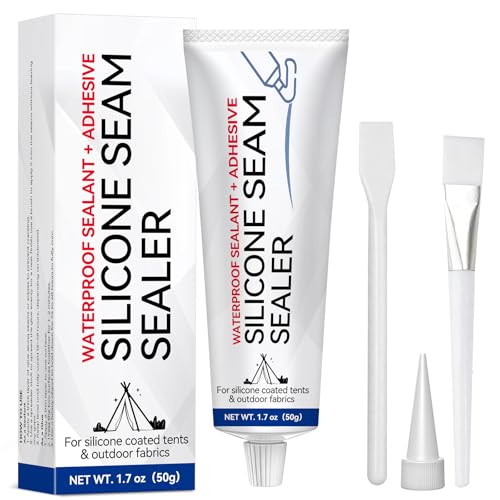
Seams are the most common leak point because every stitch is a hole in waterproof fabric. Factory tape covers them, and over years that tape lifts, cracks, and peels. The repair is to remove the loose tape, clean the seam, and apply a seam sealer made for tent fabric along the stitch line on the inside surface of the fly.
Gear Aid publishes Seam Grip WP as a waterproof sealant and adhesive for tents and outdoor fabric that works on nylon, polyester, and canvas and cures into a flexible rubber seal, and sells a faster curing version for rainfly and tarp seams. Follow the cure time on the tube you buy, and let the tent stand pitched while it sets.
Where to Look First
Check the ridge seams on the fly, the seams around the door zipper, and the perimeter seam where the floor meets the walls. Those three carry the most water. Peeling tape shows from the inside as a wrinkled, silvery strip that lifts under a fingernail.
Reproofing a Worn Coating
If water mists through the middle of a panel rather than along a seam, the waterproof coating has aged. Polyurethane coatings break down with sun exposure, heat, and damp storage, and on an older tent they can turn tacky or flake off the inside of the fly or the floor. That is a fabric sealer job.
Use a product made for restoring tent coatings. Gear Aid sells a tent fabric sealer for restoring polyurethane coating on nylon tent floors, rainflies, and tarps, with the coverage listed on the bottle. Clean the panel, let it dry, and apply evenly on a warm dry day with the tent pitched.

Fixing Contact, Sag and Pitch Problems
A rainfly works by keeping a gap between itself and the inner tent. Where the two touch, water wicks straight across the contact point and the inner wall goes wet in that spot. This is the single most misdiagnosed tent leak, and it is fixed with tension rather than sealant.
Retension the guylines so the fly pulls away from the inner canopy on every side, stake the fly corners out fully rather than leaving them slack, and check that no gear inside is pushed against the wall. Fabric stretches once wet, so a fly that was tight at dinner needs another pull before bed on a rainy night.
Zippers and Doors
Water runs down a closed door and finds the zipper. Smooth the storm flap so it sits flat, make sure the door tensions without a sagging pocket that holds water, and check the small seam where the door zipper ends, which is a common drip point.
Water Coming Up From the Ground
If the damp starts at the floor edges and spreads inward, the problem is underneath. The two usual causes are a pitch on a low spot where water collects, and a ground sheet that extends past the fly and channels runoff under the tent floor. Both look like a floor leak and neither is one.
Move the tent to the highest part of the site if you can, and check the ground sheet. It should sit inside the edge of the tent floor with nothing visible past the walls, which is covered in detail in our tent footprint guide. For a floor that genuinely wets through under pressure, a fabric sealer applied to the outside of the floor is the repair, along with a footprint underneath it.
Which Repair for Which Symptom
| Symptom | Likely cause | Fix | Do it where |
|---|---|---|---|
| Drips along a stitch line | Seam tape lifted | Seam sealer on the stitching | Inside surface of the fly |
| Fine mist through a panel | Coating worn out | Tent fabric sealer | Coated side of the panel |
| Wet patch on inner wall | Fly touching the inner | Retension guylines and stakes | At the site, no products needed |
| Damp spreading from floor edges | Ground water or oversized ground sheet | Repitch higher, trim the sheet | Under the tent |
Patching Rips and Small Holes
A tear in the fly or a burn hole from a stray ember is a different repair from a leak, and it is the easiest one. Adhesive repair patches made for tent fabric go on clean, dry fabric, with a patch on both sides for anything larger than a pinhole. For mesh, patch kits made for insect screening keep the hole from running.
Do this before the tent goes into storage rather than at the site in the rain, since every patch bonds better to a clean, dry, warm panel than to a wet one.

Preventing the Next Leak
Most waterproofing failures trace back to storage. A tent packed damp grows mildew, and mildew degrades coatings and eats at the fabric. Drying the tent completely before it goes in the bag is the single most effective habit, and it costs nothing.
Keep the tent out of prolonged direct sun too, since ultraviolet exposure ages the coating fastest. Pitching under a tarp on a long stay protects the fly and gives you dry space at the same time.
Frequently Asked Questions
How do I know if my tent is leaking or just condensating? Condensation appears evenly across the inside of the fly and is worst on cold, still, humid nights with several people inside. A leak tracks along a specific line or spot and follows the rain rather than the temperature.
Can I waterproof a tent with regular waterproofing spray? Use a product made for tent fabric and coatings rather than one designed for jackets or boots. Tent sealers are formulated to restore the polyurethane coating on flies and floors, which is a different job from a durable water repellent finish.
Do you seal tent seams on the inside or outside? Seam sealer goes on the coated side, which for a rainfly is the inside surface. Pitch the fly inside out or lay it flat so you can reach the stitch lines, and let it cure fully before packing.
Why is my brand new tent leaking? Check the pitch first. A slack fly touching the inner tent, an unstaked corner, or a ground sheet sticking out past the walls all cause wet patches in a tent that has nothing wrong with its fabric.
How long does tent seam sealer take to dry? Follow the cure time printed on the product you bought, since it varies between the standard and fast cure versions. Keep the tent pitched and ventilated while it sets so nothing bonds to itself.
Is it worth repairing an old tent or replacing it? Seams and small coating failures are worth repairing on any tent in otherwise sound condition. Once the fly coating is flaking off in sheets and the fabric feels brittle, the money is better spent on a new tent. Our family camping tent guide covers what to look for.
The Bottom Line
A leaking tent is nearly always fixable, but only if you find the actual cause first. Seams get sealer, worn coatings get a fabric sealer, contact between fly and inner gets tension, and ground water gets a better pitch and a properly sized ground sheet. Run a hose test at home, work one panel at a time, and repair before the tent goes into storage. If it is beyond saving, our family camping tent guide covers what keeps rain out, and a camping tarp keeps a site liveable meanwhile.